When it comes to flooring and protecting the concrete floor,the epoxy coating is one of the first and best solutions you can ever have. For any kind of company an aesthetically appealing, glossy, high finishing, hard wearing floor is what every owner is looking for, but behind this strong, longevity flooring solution there is a step by step epoxy coating process. Let’s break down the epoxy coating process, and find out what happens in each stage.
Epoxy does not just sit on the concrete surface, it actually makes a bonding with the concrete. During the epoxy coating process, resin penetrates into small pores of the surface which provide a strong mechanical grip. This will ensure the coating won’t peel or crack instantly, and stays for a long time.
One of the biggest benefits of the epoxy coating process is its exceptional durability. Its ability to withstand pressure and longevity makes it different from other flooring solutions. Whether its heavy machinery in industrial units or high glossy floors in commercial buildings, cars garage, or daily foot traffic epoxy suits extremely well. Epoxy literally acts like a shield, and protects the floor from any kind of damage.
Epoxy coated floors resist a wide range of chemicals and other damaging elements. Spills from oils, fuels or cleaning agents don’t soak in making the surface easy to clean and mop.in this epoxy coating installation process The coating also prevents moisture from seeping into the concrete, and which reduces the coating from cracks and long term structural damage.
Epoxy floors are aesthetically flexible. We can customize epoxy coats based on different clients’ needs, and requirements. Along with its protection ability it adds aesthetic beauty. Epoxy coating comes in a wide range of finishes, which includes glossy, matte or metallic and other decorative finishes, it can be customized to match different brand identity, interior design or personal style.
Epoxy coating stands out for its improved safety features. Its anti-slip additive reduces the risk of accidents, and damages, especially because of wet and oily substances. Some of them are heat and fire resistant,depending on the client’s requirement. The glossy effect improves visibility and lighting.
When epoxy flooring installation is properly done and maintained, it will stand for 10 to 20 years. Its durability makes it a cost effective investment. And it cannot require frequent repair and replacement for a long time.
Epoxy coating installation is not just about applying resin, or a layer,epoxy flooring installation process ensures strength, durability and adhesion. Each stage is important from inspecting the site to applying the final coat. Lets see the step by step breakdown of the epoxy flooring installation process.
Which includes;
Lets go through it step by step;
This is the first stage of epoxy coating installation process, this stage includes a detailed assessment of the site which includes a proper assessment looking for cracks or any kind of damages o n the floor. Weak spots and stains should be noted. And testing the moisture level is also a part of this stage, and it’s extremely important in this epoxy coating process, because excess moisture content will make the floor crack and damage.
Surface preparation comes as the second stage, proper preparation is the key to an epoxy floor. The concrete coat is cleaned, degreased and mechanically shot blasted to create the right preparation for the epoxy coating. Cracks and holes are repaired using fillers and mortars. This stage makes sure every corner of the concrete is well polished and repaired perfectly.
This is the third stage of epoxy coating, in this stage a primary coat is applied on the concrete and sets for adhesion. Primars help bubble trapping from the air, and provide a strong grip for the different layers. If moisture issues are detected a moisture resistant primer is used.
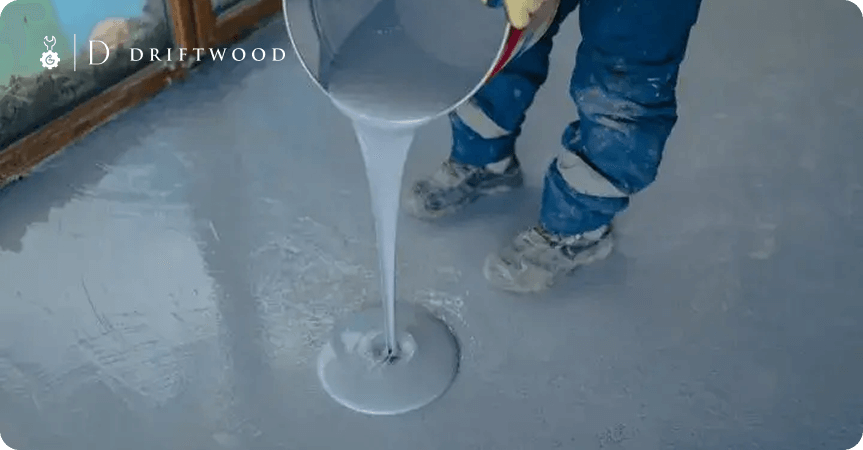
Epoxy is made by a resin part A and a hardener part B. The two components must be mixed in the correct ratio as per the manufacturer’s instructions. This mixture is blended correctly with the mechanical mixture to avoid air bubbles. It must be applied within a specific time frame before it begins to harden.
The first main coat of the epoxy is called body coat, it is spread over the floor using notched squeegee and then backrolled for even coverage, This will create a uniform base layer.
A protective top coat is applied to seal the floor and lock in any decorative element. The top coat provides additional protection to the coating and prevents it from chemicals and other moisture elements. Depending on the element the topcoat acts as glossy, matte and enhanced with an anti slip resistant agent.
Once the top coat is applied, the floor needs time to cure, it will take from 12 to 24 hours. But full curing may take 5-7 days depending on which epoxy system is used. And the final inspection also ensures there are no air bubbles, and other defects or imperfections.
As the last step of the epoxy flooring installation process, handing over the final finished floor to the client with clear instruction and maintenance. Epoxy floors require low maintenance by comparing other flooring solutions.